One of the most satisfying parts of developing Tiler has been using Tiled as our primary world-building tool.
Tiled is often categorized simply as a tile map editor, but in practice, it’s far more powerful. A map isn't just a grid of decorative tiles; it’s the engine's blueprint. It holds collision geometry, object placements, spawn points, portals, lighting parameters, weather settings, and custom gameplay properties.
In Tiler, the map is effectively the central data model for the world.
Processing Map Layers into Visual Depth
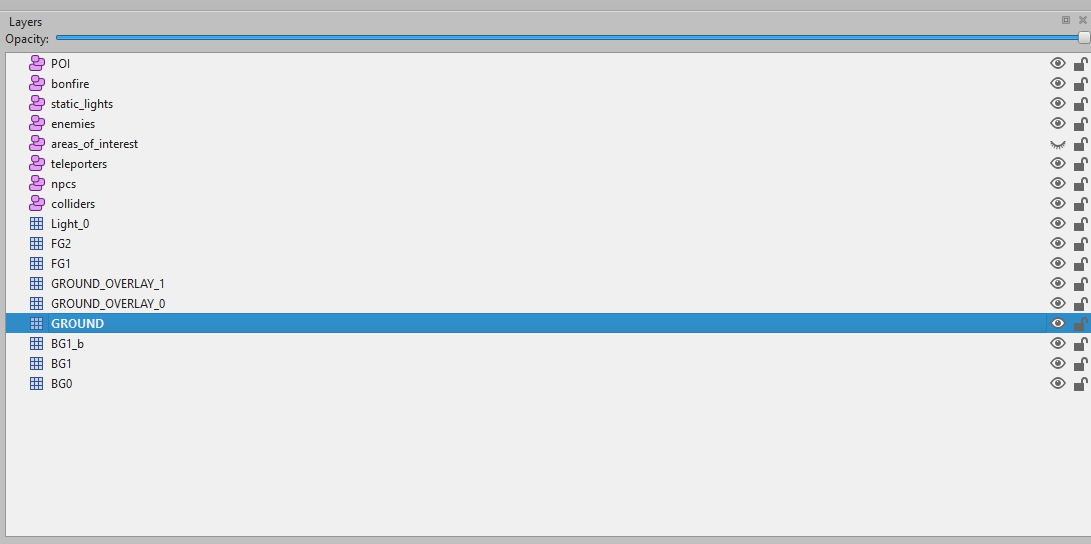
Our map loader reads Tiled’s JSON exports and categorizes layers by their class and properties. This separates background terrain, foreground scenery, additive and subtractive effects, entity placements, and collision data. Layers are composited in engine-defined groups rather than simply following their overall order in Tiled.
Viewport-based map rendering
Before each gameplay frame is drawn, the engine renders the tiles intersecting the camera’s viewport into reusable, viewport-sized render textures.
Separate textures hold the standard background and foreground, their additive and subtractive variants, and a foreground mask for revealing the parallax backdrop. Additional preparation passes generate reflection masks and detect when foreground scenery obscures a player.
Tiles are still drawn during this preparation step, but rendering is restricted to the visible region rather than the entire map. Animated tiles use their current animation frames, while render targets are reused until their required dimensions change. Full-map prerenders remain available for the minimap, which uses a static snapshot.
Scene composition
The resulting frame is assembled through seven conceptual stages, each of which may contain multiple rendering passes:
- Parallax Scenery
Distant scenery is drawn behind the world, outside the day/night lighting shader. It remains visible beyond the map’s edges and through specially color-keyed openings. Ordinary empty background pixels inside the map are filled with black rather than exposing the backdrop.
- Background Terrain and Reflections
Standard background tiles are followed by additive and subtractive background effects. Reflections of players and NPCs are composited onto surfaces marked as reflective, using masks derived from the visible tile artwork.
- Ground Items and Effects
Pickups, hazards, ground-level attack warnings, and co-op summon signs are drawn beneath characters and other world objects.
- Characters and World Objects
Enemies, bosses, NPCs, chests, bonfires, and the player are drawn using an ordered combination of bottom-half and top-half sprite passes. This allows parts of objects to overlap the player without treating every entity as a single flat layer. Co-op characters and airborne hazards are also drawn within this stage. This is an explicit draw order, not a general-purpose Y-sorted entity queue.
- Foreground Scenery and Occlusion
Foreground tiles cover the world, followed by their additive and subtractive effects and foreground reflections. Foreground-reveal shading helps keep obscured players visible, while a separate color-key mask restores the parallax backdrop through designated openings. Static-light sprites and animated map objects are then drawn.
- Effects, Feedback, and Interface
Player visibility outlines, particles, weather, beams, projectiles, damage numbers, world-space indicators, and exploration fog are composited over the scene. Debug overlays follow, then the screen-space damage vignette, HUD, dialogues, and menus.
The assembled scene is rendered into an off-screen framebuffer. Nine Lives applies film grain followed by soft CRT processing, then scales the result to the window or browser canvas.
Day/night illumination and local lights are applied during the relevant world-rendering passes, rather than as one final lighting overlay. Blend-mode layers and selected feedback effects deliberately bypass that shader to preserve their brightness, color, or transparency.
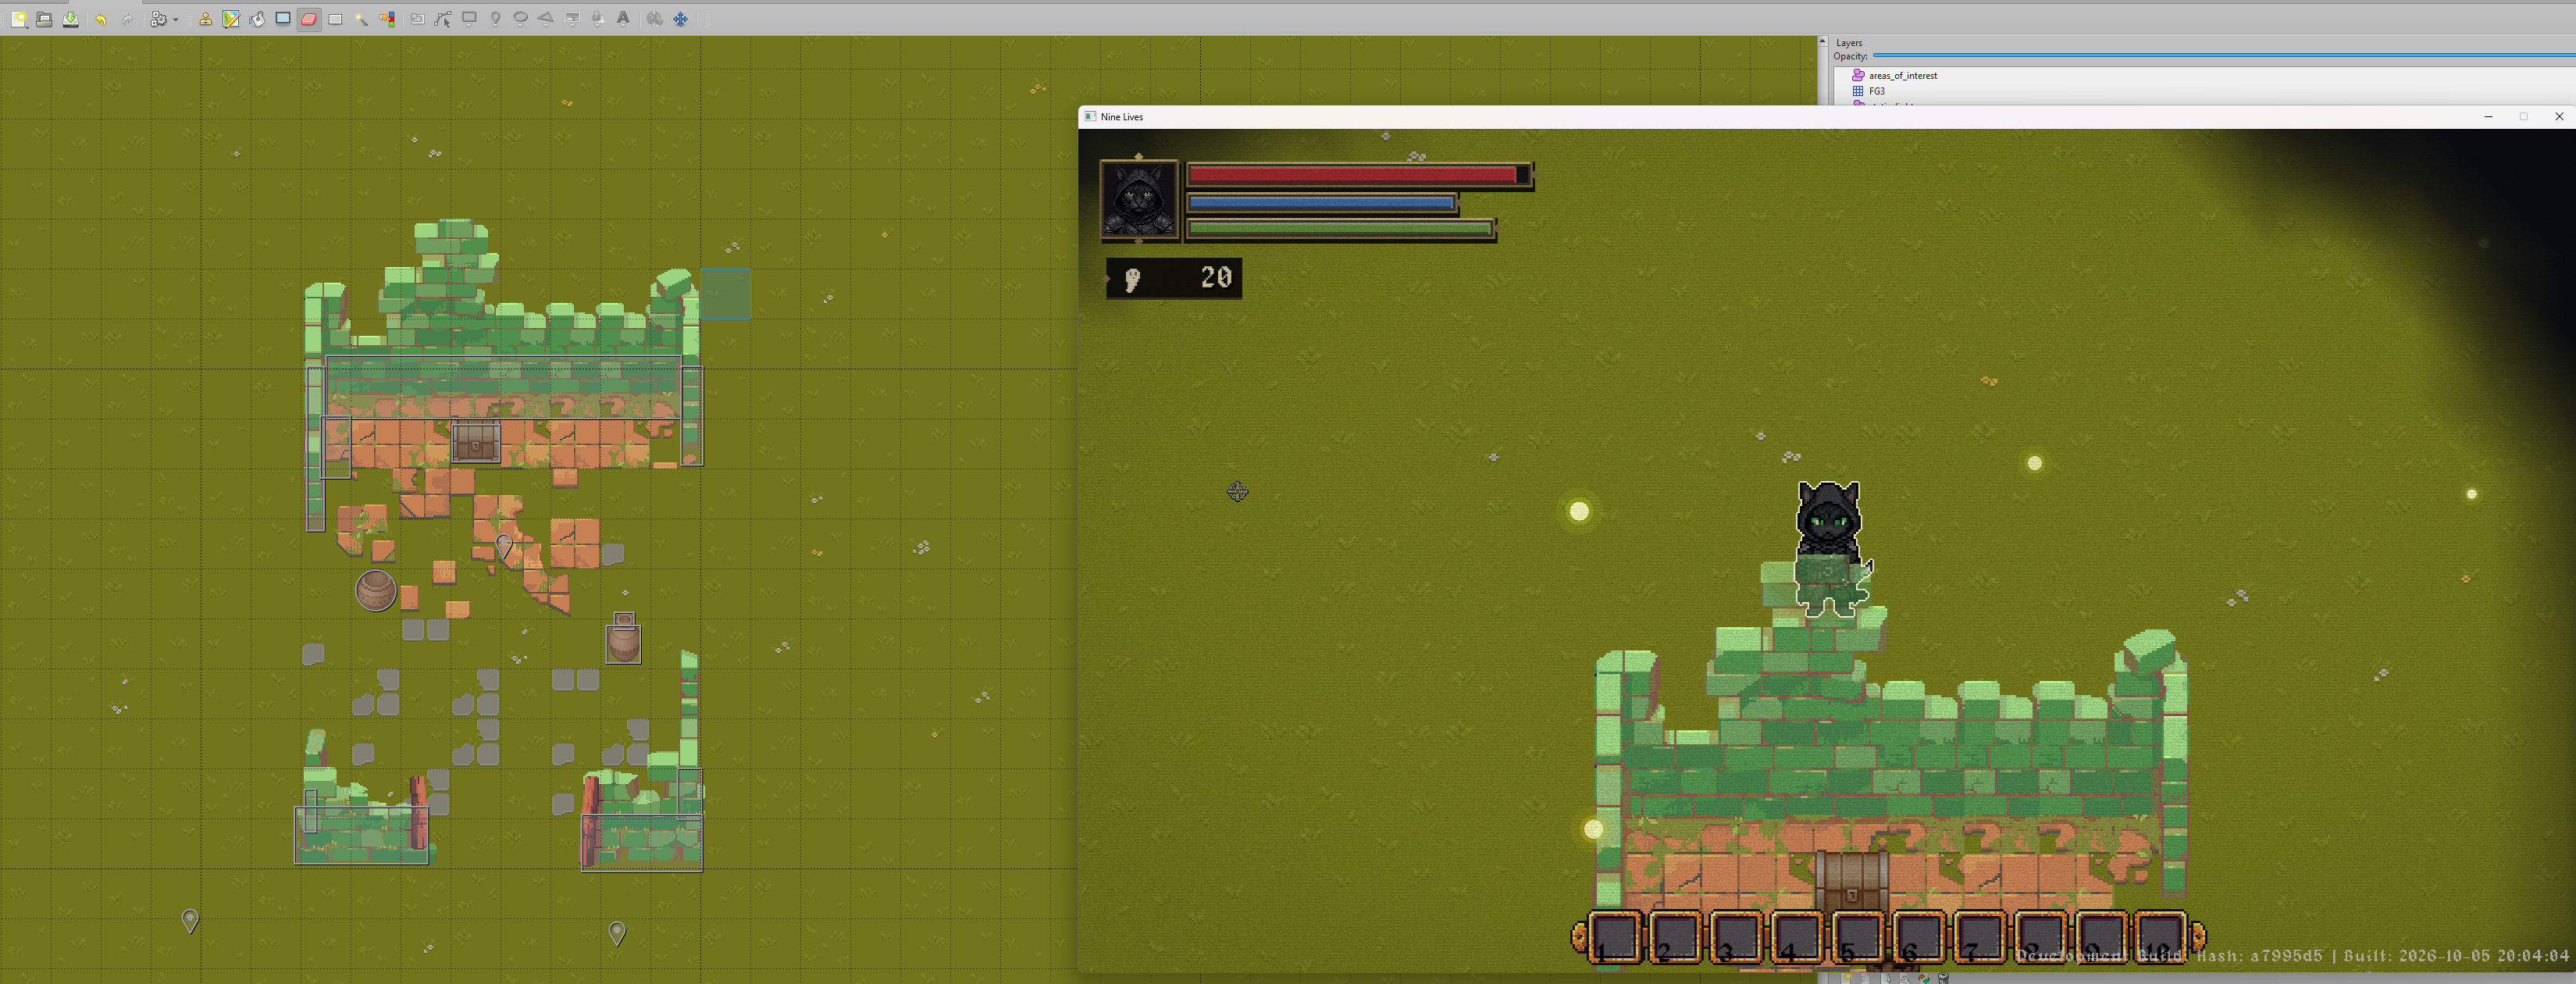
This layering is crucial for building atmosphere. A foreground layer can place tree branches, crumbling walls, or dense fog in front of the player. Meanwhile, additive and subtractive blend layers introduce glows, light shafts, and shadows without needing a unique game entity for every visual effect.
Additionally, our pipeline supports foreground masks, which give us precise control over how parallax backdrops peek through specific gaps in the foreground—making spaces feel occluded and deep rather than flat.
Unifying Visuals and Collision
Tiled also streamlines our workflow by keeping collision geometry directly tied to the visual environment.
Tile colliders can be authored directly inside tilesets or placed on dedicated map collision layers. Instead of scattering hardcoded collision coordinates throughout C++ scripts, the level design itself dictates physical space:
Wall & Slope Tiles block or direct character movement.
Floor Regions assign material types (e.g., grass, stone, shallow water) for footstep audio and particle effects.
Solid Objects dynamically register with the world's physics grid.
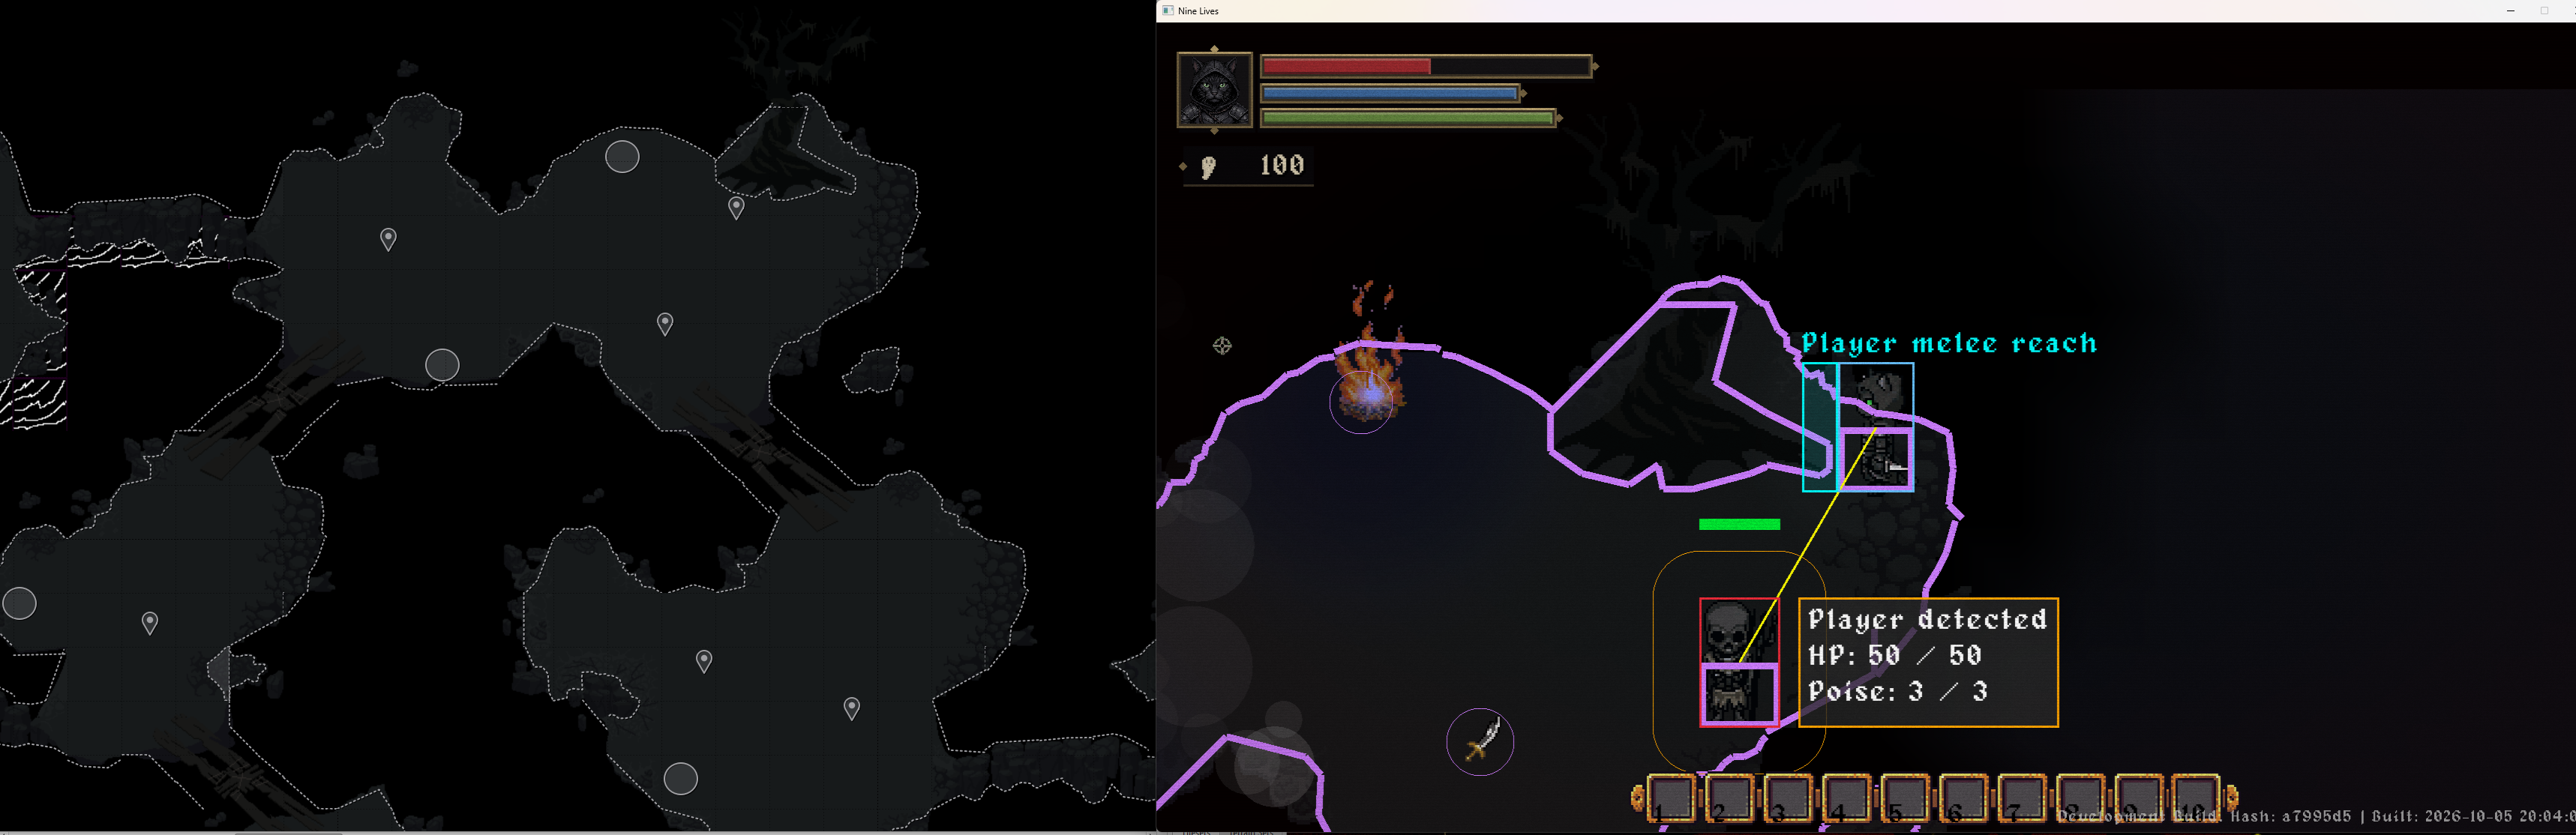
Upon loading, the game converts this authoring data into engine collider objects used seamlessly by player physics, enemy AI, projectiles, and pathfinding navigation.
Map Layers as Gameplay Generators
Beyond tiles, the map loader processes Object Layers to populate the game world. Depending on the object's class and custom properties, the engine instantiates active game objects on load:
Entities: Enemies, bosses, NPCs, and spawn points
Interactive Objects: Chests, bonfires, doors, and portals
Environment: Static lights, animated scenery, points of interest, and material regions
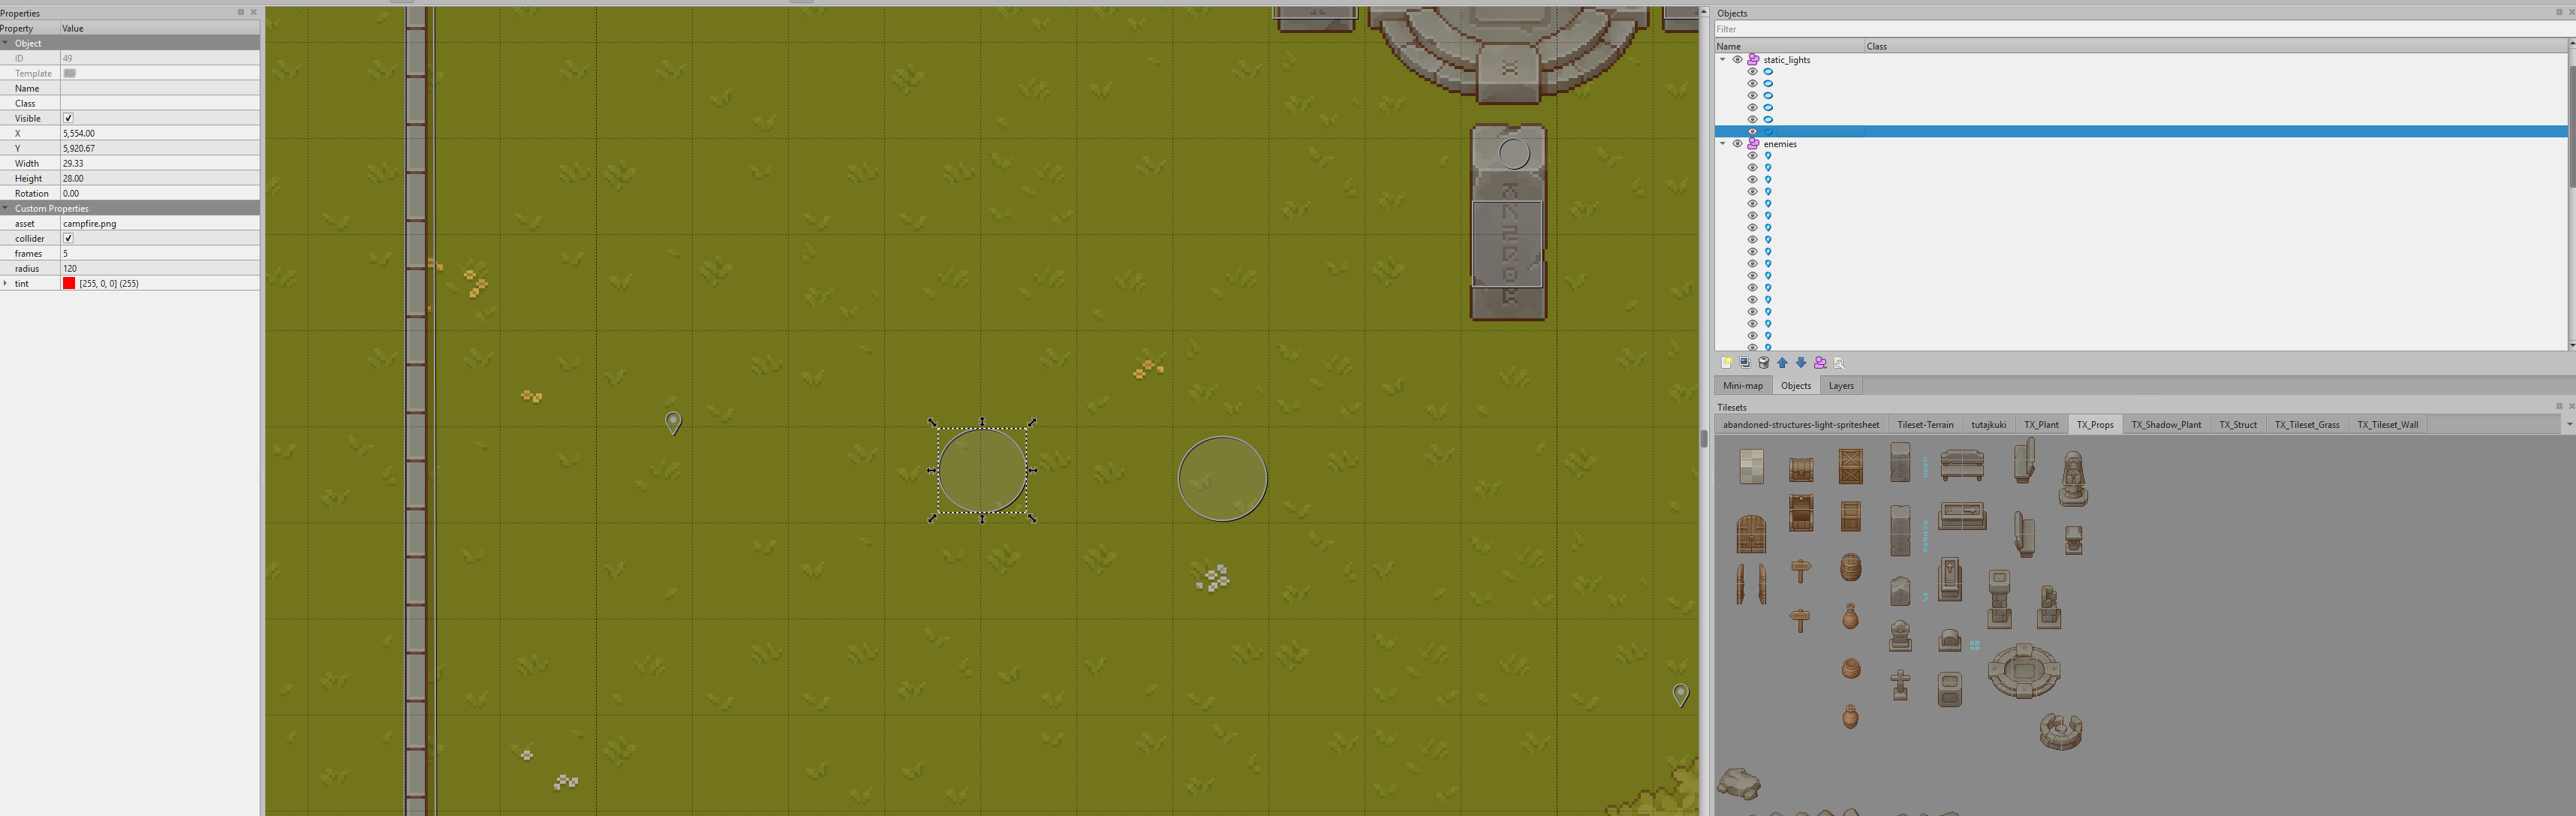
This workflow gives level designers immediate creative control. Placing an object and tweaking its properties in Tiled directly influences how the engine interprets it:
An animated object specifies its sprite sheet asset, frame counts, animation speed, and optional collider.
A Point of Interest (POI) holds custom IDs and display names for navigation or discovery text.
A Portal defines target destination coordinates and map file paths.
Global environmental properties work the same way. Map files specify ambient lighting levels, background music tracks, weather patterns, and day/night parameters controlling not just how a level looks, but how it feels and sounds.
Staged Map Loading
To keep the game responsive, map loading is split into discrete stages across multiple frames while the loading screen is active:
By staging disk reads, entity instantiation, and texture pre-rendering separately, we avoid heavy single-frame CPU spikes and keep the loading transition smooth.
Bridge Between Design and Code
The more I refine this system, the clearer it becomes that maps are the crucial bridge between art design and engine logic. Tiled is where the world is authored; the engine's map loader is where that design becomes an active, living environment.
We aren't simply drawing tiles. We are defining physical space, navigation, atmosphere, combat encounters, interactive points, and gameplay rules in a visual interface.